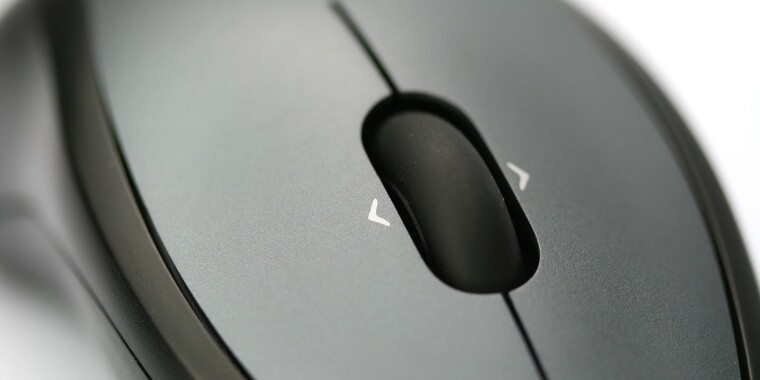
Has your computer mouse suddenly started giving you a lethargic or inconsistent response? This can be frustrating, right? So, what could be the reason for this unexpected behavior? While most of us blame the quickly draining battery or some hardware issue, it could even be the accumulated dirt and dust. At this point, you need to know how to clean a mouse sensor.
No matter which mouse brand and model you are using, the buildup of dry dirt and sticky substances is inevitable. The mouse can be mechanical, optical, wireless, or wired; it does not matter.
This buildup can be due to the dust on the mouse, in palms, or on the mouse pad. It then gradually incapacitates the mouse’s sensor, which negatively affects the mouse movement as well as other responses.
Well, the good news is that you can easily clean a mouse sensor in a couple of minutes. Let’s understand the procedure for different mouse types in this post.
Worth checking:
- How to prevent mouse stuttering in games?
- What to do when your mouse keeps disconnecting?
- Best Ergonomic Mouse for Carpal Tunnel
How to Clean a Mechanical Mouse Sensor?

A mechanical mouse is a ball mouse. When its pointer starts getting stuck in a single position while you are trying to move it, consider this as the indicator to clean the mouse sensor. Following are the steps to do so using a damp cloth, pair of tweezers, air can, and a knife:
- Turn off the computer.
- Detach and flip the mouse.
- Remove the base plate that accumulates the ball.
- Remove the ball.
- Clean the ball using a wet cloth.
- Clean the sensors inside using the air can and tweezers. Dirt typically builds around the rolling sensors (rollers), which you can easily remove with tweezers. If the buildup is thick or sturdy on the rollers, you would need a knife for removing the same.
- Remove the residues seen on the cavity surrounding the ball using tweezers or a knife.
- Reinstate the ball and the base plate.
- Connect the mouse.
How to Clean an Optical Mouse Sensor?

If an optical mouse sensor needs cleaning, its pointer movement will start becoming erratic and will also start jumping across the screen without any apparent reason. Although an optical mouse usually calls for less maintenance than a ball-oriented one, it is wise to clean it at a fixed interval, such as once a month to ensure smooth mouse performance.
Cleaning an optical mouse sensor is quick and easy. Following are the steps for cleaning the sensor of an optical mouse:
- Turn off the computer.
- Remove the cable if the mouse is a wired one, which will be typically connected to the USB port. Ignore the first step if your mouse is attached to a USB port or is a wireless one.
- Flip the mouse.
- Locate the LED and the lens.
- Blow off the debris lightly from the lens.
- Wipe the lens area with a cotton ball if you spot a mark on the lens.
- Re-attach the mouse cable.
- Turn ON the computer.
You can even wipe the lens area using a cotton ball whose one end is damped using a few drops of suitable cleaning fluid. This end should then take off any residue or dust. While cleaning, regardless of whether you use a damp or dry cotton ball, avoid putting any pressure on the LED or lens sensor or fluid directly onto it.
In addition, do not squeeze additional fluid from the cotton ball while cleaning. In the end, dry the wiped lens area using another cotton ball. Finally, allow the mouse to dry for around three minutes and then re-attach the mouse.
You should also examine the working surface of your mouse, which can be your mouse pad. If the surface has a complex pattern on which you are using the mouse, know that it can be hard for the sensor to deliver the expected mouse movements. In this case, consider replacing the pad. Otherwise, just maintain it dirt-free.
How to Clean a Laser Mouse Sensor?

A laser mouse is a great alternative to a roller-ball mouse in terms of maneuverability. However, it is susceptible to smudging or get jammed by grime. Beneath a laser mouse, there are soft pads that enable the mouse to slide. When these pads get dirty and sticky, it negatively affects the mouse movement.
The good news is that it is easier to clean a laser mouse than a traditional one having a ball. Following are the steps to clean a laser mouse:
- Turn off the computer.
- Detach the laser mouse from the USB port. Glancing at the emitted laser can harm your eyes. Thus, ensure that the mouse is detached safely. You can ignore the first step.
- Lay a clean piece of paper on the work desk.
- Gently hold the mouse using the paper’s bottom edge.
- Glide it to the paper’s top by applying slight pressure. A dark line will be seen on the paper, as the grime and grease come off.
- Spot the mouse pads and check if all dirt and grime have come out or not. If pending, scrape it off using a toothpick or a fingernail. If the grime is rigid, use a dampened soft cloth to remove it using your fingernail. The cloth should be wet such that no liquid drips from it. Dampen the pads.
- Repeat steps 4 to 6 until the pads are clean.
- Wipe the beneath as well as the top mouse surface using a damp soft cloth. In the case of rigid grime, consider rubbing mild soap.
- Remove the dirt from the hole that has the laser with a Q-tip.
- Dry the mouse well using a dry cloth. If liquid goes inside the mouse, do not use it until it is fully dried in the air, which is likely to take a few days.
- Reattach the mouse.
How to Clean a Sticky Mouse Wheel?

One of the most common issues for those who spend most of their time on a computer is a jammed or sticky scroll wheel of the mouse. The rubber wheel area of your mouse can easily pick and accumulate dust, hand oils, and food particles.
A sticky wheel or dirty wheel sensor can decline the productivity, especially if the mouse gets a bit unresponsive. Fortunately, it is easy to clean the mouse wheel sensor without much effort or time.
All you need is a couple of easily available things such as rubbing alcohol or isopropyl, a cleaning cloth, a can of compressed air for cleaning the interior smoothly, a few rags, a sticky roller and a lint roller, toothpicks, and Q-tips. Throughout the cleaning procedure, ensure not to stretch the wheel’s rubber or else it will accelerate the course of wearing.
Following are the steps to clean a sticky mouse wheel:
- Start by cleaning the mouse pad, as you will keep the cleaned mouse on a clean pad. While the pad is typically made up of rubber and cloth, it is the cloth area that you need to clean, as you place the mouse on it. Roll a lint roller on the pad to remove all the seen dust and then apply the compressed air to clean the rear rubber part of the pad. Here, the lint roller will not work due to rubber.
- Turn off the computer.
- Remove the mouse from the CPU port if it is wired or remove the wireless dongle or adapter and batteries if the mouse is wireless.
- Clean the base of the mouse by first removing the mouse feet pads or stickers gently and not allowing them to contact anything else due to their adhesiveness, dropping a Q-tip in isopropyl, and applying it on gaps visible on the bottom surface to take off the gravels locked inside.
- Clean the mouse’s top surface by first using the cloth to remove small particles, moistening a rag by dipping it in isopropyl, and wiping the top part with this rag to remove both dirt and oil that did not come out with the cloth wipe. Finally, use the Q-tip dipped in isopropyl to clean the surface without rubbing it too hard. Otherwise, anything printed will also come out. Also, do not allow the liquid to get inside the cracks seen between the buttons.
- Now clean the scroll-wheel by keeping the mouse in bright light, spinning the wheel to see the grime, and applying a Q-tip dipped in isopropyl over the circumference. Doing so will loosen some rigid accumulations while removing some grime.
- Now, slide a toothpick along the wheel’s ridges but away from the mouse and wipe anything that is left behind on the mouse’s exterior.
- Now, finally, wipe the mouse.
Conclusion
Discerning how to clean a mouse sensor for different mouse types can give you a long-living mouse with smooth movements. You only have to follow the respective steps in the right way.