
Just another day of scrolling tech posts, and suddenly you find out that overclocking your CPU will give you better performance.
Then, you follow all the CPU overclocking tutorials, but wait, something doesn’t seem right. Your CPU is performing just like before. A cloud of frustration roams above your head about what went wrong.
Heads-up, because we’re here to banish that frustration cloud. To ensure everything is okay, you have to check whether your CPU was successfully overclocked or not. So, how to check if the CPU is overclocked? You can open the task manager and monitor the frequency.
Yeah, we guessed that such a short answer wouldn’t satisfy your inner tech enthusiast. So, join us as we venture into the world of CPU overclocking and find your answer.
How to Check If CPU is Overclocked?
Checking whether your CPU is overclocked or not is by far the easiest part about overclocking. You just have to know where to look. So, let’s start exploring, shall we?
Task Manager
Checking from the task manager is the most straightforward way because it doesn’t require installing any additional third-party software.
There’re three ways you can bring up the task manager.
The first way is to right-click on the taskbar, located on the bottom of your computer by default. After right-clicking, you’ll see a list of options. Now, click the taskbar menu.
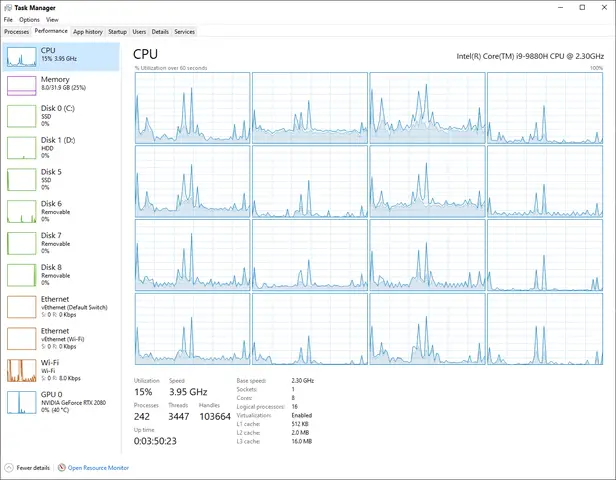
It’ll bring up the taskbar. Now you’ll see lots of tabs like processes, performance, app history, startup, etc. Select the performance tab.
From here, click the CPU tab located on the left. Now, look at the right side and see if the CPU speed is running higher than the maximum frequency.
A quick google search with your CPU’s model number will tell you what the maximum frequency of your CPU is. If it’s running higher, your CPU is overclocked.
You can also bring up the task manager by pressing the Ctrl+Alt+Del key and then selecting task manager, or you can just search “task manager” on your Windows search.
No matter how you open the task manager, the process of checking whether your CPU is overclocked or not is the same.
BIOS
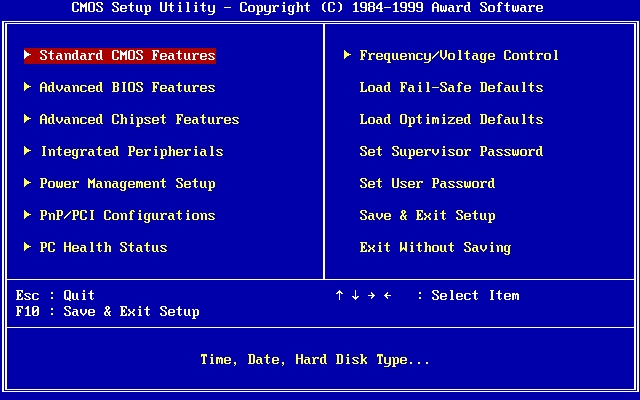
Auditing from the bios menu might scare you a bit as there’re tons of options and settings. Well, you don’t need those anyway. All you have to do is remember what the default values were before you overclocked your CPU.
Now, turn on your PC, and when the motherboard logo shows up, press the BIOS menu button. Most of the time, it’s either del, F11, F12, or sometimes F8.
Once you access bios settings, go to your motherboard’s respective overclocking menu and see if the CPU VCore, CPU ratio, CPU voltage, and the CPU multiplier are at the default settings or it’s the value you previously set.
If you find that all the values are more than the default, your CPU is running at an overclocked speed. By the way, don’t forget to save your bios changes before closing the bios menu and booting up windows.
Third-Party Software

If you’re sure that your CPU is operating at higher values than the default ones, it’s time to check the overclock one last time. Cross-checking with third-party software is the most accurate way in this case.
For this step, we’ll be using HW monitor. Why this? Because millions of PC enthusiasts use HW monitor, and it’s free to use.
Download the software, install it, and then open it up. You can also use CPU Z.
Besides, you’ll need another software called AIDA64 extreme. Once you open it up, it’ll inform you that it’s a trial version. Ignore that, because it’s not an issue. Okay, we assume that by now, you have either HW monitor or CPU Z running in the background? Great, now let’s start.
You’ll see a list of menus on the top left side of AIDA64. Select the “tools” menu from that list. After that, select “system stability test”. This will bring up a new window.
Now, you can see multiple options at the top left corner like stress CPU, stress FPU and stress GPU. Only tick the stress CPU option and leave out all the other ones. Now hit okay and let the stress test run for 15 to 20 minutes.
Meanwhile, open up HW monitor or CPU z and monitor the CPU speed or the clock speed. If the clock speed is running higher than the rated boost clock speed, then voila, you got yourself an overclocked CPU.
Again, if you don’t know your processor’s rated boost clock speed, you can hit up Google with the processor’s model number. For example, if you have an intel core i7 10700K, it has a max turbo (Intel’s way of saying boost) frequency of 5.10 GHz. So, if your intel core i7 10700K runs higher than 5.10GHz, it’s overclocked.
After 20 minutes, turn off the AIDA64 stress test and close all the programs.
Just a reminder: Don’t be alarmed if someone else achieved a higher clock speed with the same processor as yours. Not everyone will get the same CPU speed, this is called the silicon lottery.
Should You Overclock Your CPU?
If overclocking gives you such a speed boost, why don’t manufacturers do it themselves? Why let us do it instead? Is there something fishy behind it? These are astute and good questions.
First of all, manufacturers do overclock your CPU. It’s just not listed as “overclock”. Instead, it’s mentioned as a boost or turbo clock; every CPU has a turbo clock and a base clock. Also, the base clock or frequency is the normal processor speed and the boost or turbo clock is the maximum speed your processor can gain under 100% load.
The reason why it’s not listed as overlooked is that CPU manufacturers test those CPUs and set a safe CPU frequency. This means that the boost clock speed won’t create problems even if it runs 24/7.
Anything above this base speed and boost speed is considered overclocking. Manufacturers don’t push these CPUs to their limit because they want you to do it. The more you increase the core speed, the more heat your CPU will generate, and you know, heat is a machine killer.
Now, ask yourself, do you want to gain more core speed by sacrificing the lifespan of your CPU? Okay, we can understand that.
There must be a safe way to protect your CPU and overclock it at the same time, right? Today’s your lucky day, because there’re a few ways to keep your overclocked processor safe.
How to Keep Your Overclocked CPU Safe?
Okay, so you’ve increased the computer’s CPU core ratio from the UEFI settings (commonly known as BIOS screen), now what? Overclocking increases performance but generates more heat and overheating leads to a premature CPU failure.
So, how do you keep your precious CPU alive and kicking for many years to come?
Get a Good Motherboard
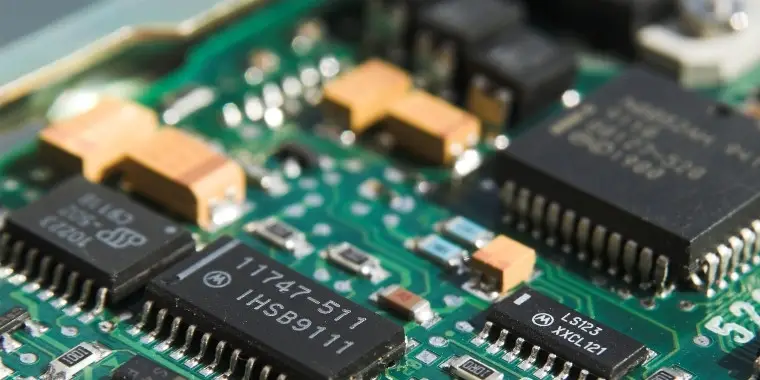
A good motherboard is one of the most crucial things for people who want to overclock their CPU. As we’ve said earlier, overclocking increases heat. This heat isn’t only limited to the CPU,it also affects the board.
Motherboards have VRMs on them. These VRMs, or voltage regulator modules, control all the electricity and voltages. As overclocking and voltage go hand in hand, you’ll need a board with high-quality VRM if you want to keep your CPU safe.
If you own an Intel processor, your only option is to get an X series board, because H or B series ones aren’t capable of overclocking. You should also make sure that your board has VRM heat sinks. These heat sinks will help dissipate heat from the VRMs and keep them cool.
We’d also suggest getting the most expensive board you can afford. Don’t go for budget X series boards. Expensive boards have high-quality capacitors and other necessary stuff to protect your PC.
Install a Good Cooler
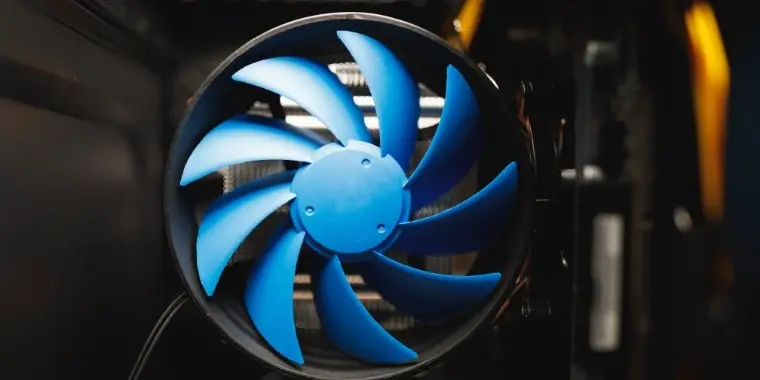
First of all, if you’re running your intel K-series CPU with the stock pile-of-junk cooler, remove it immediately and throw it away. It’s a cheaply-made cooler that will underperform and not last. Do note that not every CPU from intel is overclockable.
If you’re operating an AMD Ryzen processor, you might be able to get away with the stock CPU cooler because it’s a decent one. You can do light overclocking with it, but keep an eye on the temperature.
For intel K-series processors and higher-end Ryzen processors, you should get a liquid cooling system or at least an expensive air cooler like the Noctua NH-U12A. After buying a suitable cooler for your PC, you’ll have to perform stress tests.
To do that, open up AIDA64 and stress test the CPU. After 15 minutes, examine the temperature of the individual cores using an HW monitor.
If the temperature doesn’t go above 80C, you can try pushing your luck and increase the current speed a bit more. After increasing the frequency, rerun the stress test. Continue to play with the speed until your CPU reaches 80 to 85C. 75C is the sweet spot, but it’s okay if it reaches 80C.
Look out for the blue screen as well. If you face a blue screen, use the last safe frequency value. Remember that keeping the CPU cool will make it thrive.
Power Supply
Using a branded power supply with a gold or bronze rating is mandatory. As overclocking will require more voltage, your CPU will consume more power. Check how much your CPU is likely to consume and buy more than the required wattage.
For example, Core i7 12700K consumes around 300W (without any graphics card) when using Blender. So you should at least have a 550W PSU for future upgrade path and safety. If your system receives sufficient power, your CPU will perform well.
Final Words
If you’ve read this far, we’re pretty sure you know all there’s to know about CPU/processor overclocking. And we’re also sure you’ve made up your mind whether to overclock your CPU or not.
To be honest, most people don’t even need to overclock. As long as you have an excellent price to performance ratio CPU, you’re all good without it.
No matter what we say, you’ll probably overclock your CPU, because tech enthusiasts always want more speed. The good news is that now you know how to check if CPU is overclocked or not.