
The emergence of LCD screens in the display tech market has significantly improved the viewing experience since they produce a smoother image that is soothing to the eye. However, compared to traditional old screens, modern LCDs come with much thinner bezels, which make them vulnerable to external pressure.
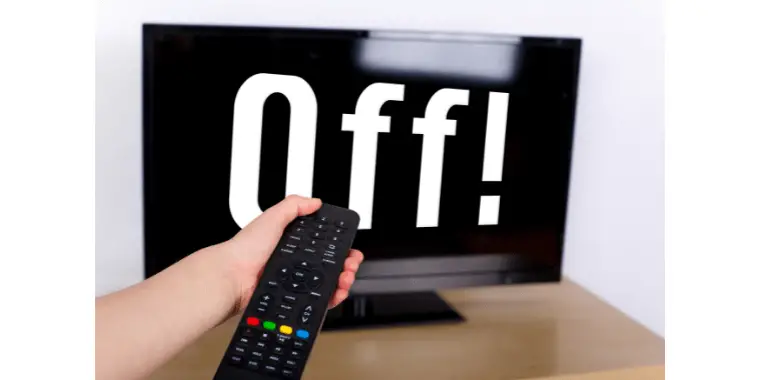
As a result, if you accidentally put extra pressure on an LCD screen, a pressure spot may appear. These can negatively impact your workflow since the image displayed in the damaged area may not be visible. However, the cost of replacing an LCD is quite high, so it is worth attempting to fix the issue.
If you are wondering how to fix pressure spots on an LCD screen before, then you are definitely in the right place!
In this article, we will walk through the whole process step by step so that you can find the best fixes that may save you money.
- How to Fix Pressure Spots on LCD Screen
- Method 1: Try This If You Have a White Spot on Your LCD Screen
- Step 1: Get Your Device Ready for the Fix
- Step 2: Open it Up
- Step 3: Remove the Screws
- Step 4: Remove the TV Speaker Carefully
- Step 5: Remove the Protective Case of the Panel
- Step 6: Remove the White Sheet from the TV Panel
- Step 7: Attach All the Loose Lenses to the Lights with Glue
- The Last Step, 8: Put Everything Back Together
- Method 2: Apply This If You Have a Black Spot on Your LCD Screen
- Method 1: Try This If You Have a White Spot on Your LCD Screen
- What Should You Know Before You Fix Pressure Spots on an LCD Screen?
- How Can You Prevent Pressure Marks on Your LCD Screen?
- Frequently Asked Questions
How to Fix Pressure Spots on LCD Screen
Basically, putting extra pressure on an LCD causes dead or stuck pixels, screen flickering, and blurriness. These spots can appear white, blue, or even red color.
You might be wondering, “Can Pressure Marks be Fixed”? To be frank, it would be hard to fix every kind of pressure spots, but some can successfully be fixed.
So, let’s have a look at the possible strategies that work for specific kinds of spots.
Method 1: Try This If You Have a White Spot on Your LCD Screen
White spots are often caused by a reflector panel, or lens, dropping out of place on the LCD screen. This is especially true in the case of LCD TV screens. These panels are usually situated opposite the LED backlight and are utilized to spread the LED light on the display. Usually, they fall away because of overheating. When that happens, the white spots appear.
To fix this, follow these steps:
Step 1: Get Your Device Ready for the Fix
1. Switch off your TV.
2. Unplug the main power supply.
3. Unscrew its feet.
4. Lay the screen face down on a soft protective surface.
Step 2: Open it Up
1. Remove all the external screws and don’t touch any other internal components.
2. Take the back panel off the TV.
Step 3: Remove the Screws
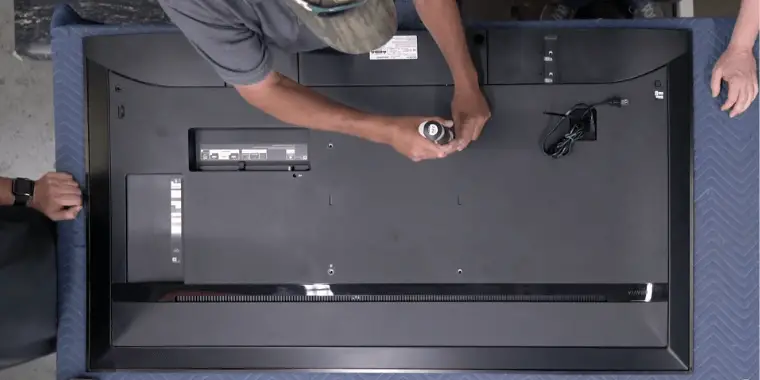
1. Remove all the internal screws. Since it can be difficult to remember where all the screws go, it is wise to either carefully set them in order or take notes concerning their location.
2. Remove the internal plastic cover to expose the speakers.
Step 4: Remove the TV Speaker Carefully
1. Jiggle the speakers gently until they come loose.
2. Unplug the speakers from the circuit board, and then remove them.
3. Unplug the ribbon cable on the circuit board.
Step 5: Remove the Protective Case of the Panel
1. Use a flathead screwdriver to remove the metal protective cover and expose the bottom circuit stops.
2. Carefully unclip the bottom circuit stops.
Step 6: Remove the White Sheet from the TV Panel
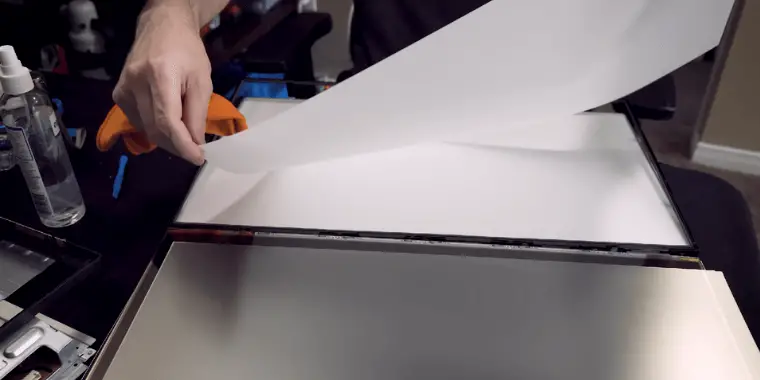
1. Gently lift the TV screen onto its side.
2. Do not remove the frame that borders the front and edge of the TV screen.
3. Place the TV face down again.
4. Lift the back of the TV and separate it from the screen.
5. Take the screen/display panel away.
6. Unclip the plastic frame. Be very gentle as the plastic is fragile.
7. Take the plastic frame away so white sheets can then be removed.
Step 7: Attach All the Loose Lenses to the Lights with Glue
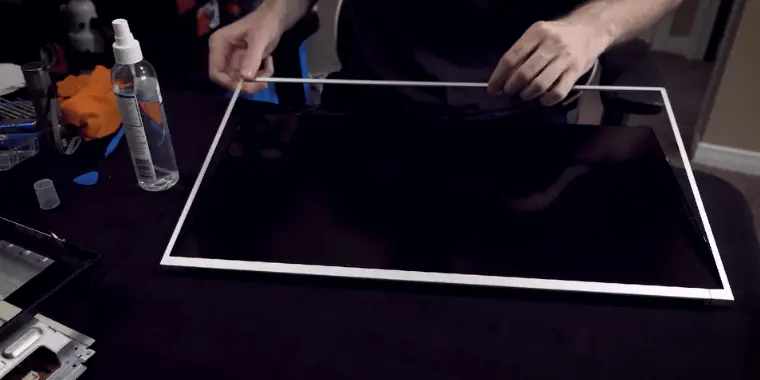
1. Now lift the white sheets to expose the plastic circular lenses. These are the bits we need to fix—Finally!
2. Remove the white sheets so we can do the real work.
3. Now remove any loose plastic lenses (probably all of them).
4. Place glue on the three feet of each lens.
5. Insert each lens back into its location.
6. Allow time for the glue to cure. (In some cases, it may take several hours.)
The Last Step, 8: Put Everything Back Together
1. Ensure all plastic lenses are firmly in place and the glue has cured.
2. Put everything back together in the opposite order that you took it apart.
Now set up the TV as it was and power it up. The white spots should be gone.
The whole process may take some time, so try this method when you have plenty of free time. A similar method will be used for a laptop screen as well.
Method 2: Apply This If You Have a Black Spot on Your LCD Screen
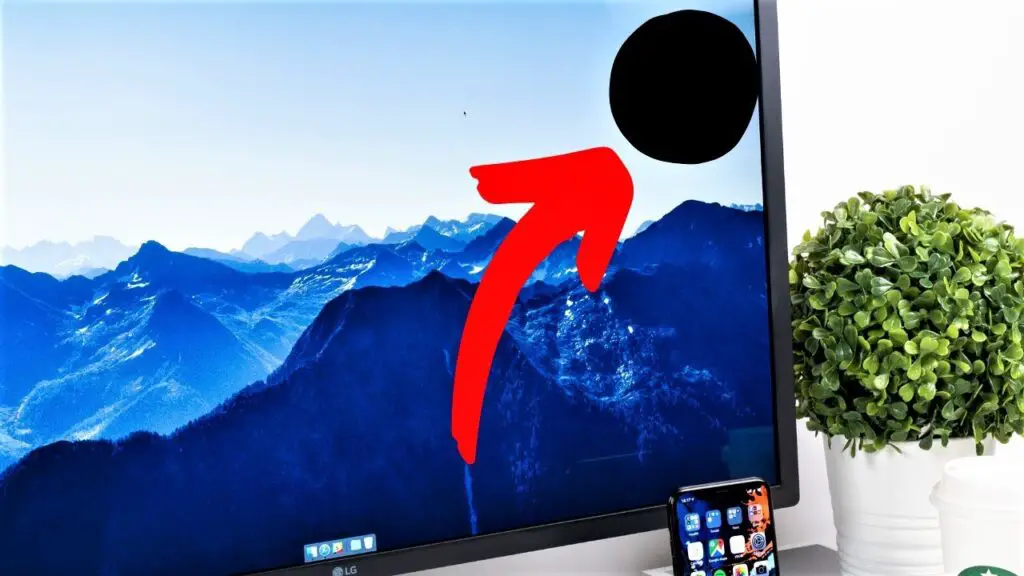
Black-colored pressure spots appeared on the monitor because some pixels on the panel are dead and, consequently, they are unable to display color. Though it is not possible to fix such spots on an LCD, you can move them to the corner of the display.
To do so, take a soft piece of cloth or rubber and rub the black spot greatly. If it moves, continue to gently rub it until it is where you want. After you have positioned them to the side, you can cover them with white paper. Doing so will reduce eyestrain and allow you to continue using the display.
Let’s imagine your black spots appeared in a circular shape. To cover them with white paper, you need to cut out a circular shape that is the same size as the spot. Place the paper on top of the black spot and attach it with transparent tape.
Hopefully, you will be able to follow, and this method will let you bring your black spot where you need it.
What Should You Know Before You Fix Pressure Spots on an LCD Screen?
Since pressure spots are not all the same and only some can be fixed, make sure you consider the following things before attempting a fix. If you choose the wrong process, your display can become severely damaged.
Check to See if Your Screen Has a Warranty
If you see a pressure spot on your TV, laptop, or phone screen, first check to see if the device’s warranty has expired or not. If it has not expired, determine whether it covers the display part or not. If your device remains under warranty, do not try to fix the problem yourself. In many cases, even removing the screw and opening the casing will void your warranty. So, only try to fix the pressure spots on your LCD if your warranty period has expired; otherwise, contact your device manufacturer for free servicing.
Dead Pixels Can Be Increased, so Don’t Overdo it if There is a Black Spot
If your display has a pressure spot and the dead pixels are black, do not try to fully eradicate it by rubbing too much. If you overdo the process, the black spots will spread, and your monitor will be totally damaged. Instead, you slowly rub it and try to move the spot into a corner. Once it is there, do not touch it again. Replace the LCD when the condition is no longer bearable.
It Is Good to Call Your Expert Friend
If you are not a tech enthusiast or have never fixed a technical gadget, it would be good to ask a friend who has more experience in this area to help you. After all, if you make a mistake, then the problem will become worse. So, feel free to call up a buddy who is passionate about technology.
If that isn’t an option, you should consider going to a shop or calling an electrician who has been dealing with such things for a long time.
How Can You Prevent Pressure Marks on Your LCD Screen?
Instead of attempting to repair or paying to replace a broken LCD screen, it is preferable to prevent pressure spots from developing in the first place. Here are some good habits and practices that will prevent your screen from becoming damaged.–
Set Your Monitor in a Safe Place

Whether you have an LCD TV, laptop, or desktop monitor, it is important to position it in a safe place. Sometimes children throw stuff or pets accidentally run into a poorly placed LCD and cause permanent damage. So, make sure your display is in a place where there is less of a chance of it becoming physically damaged.
Be Gentle When You Touch the Screen
Whenever you clean your LCD panel, be attentive and only touch the panel with a soft cloth. If you put too much pressure on the panel, it will become damaged. Cleaning your display with a soft cloth will ensure that you are not applying too much pressure, and your LCD display will last long.
Use a Screen Protector
To prevent your display from any unwanted accident, it is always good to use a screen protector. This alleviates some of the risks associated with setting it up and cleaning it. You can easily find a screen protector for your TV, laptop, and phone screen, and it is an easy way to safeguard your display.
Never Put Heavy Stuff on Top of Your LCD
To protect your display from developing pressure spots, you should anything heavy on top of it, even put a book. If you want your LCD screen to last long, then keep heavy items safely away from it.
Always Run Your System on Recommended Software
You should always use the recommended operating system and settings to run your PC, phone, and TV. Overriding any functionality can affect the longevity of the product. Be particularly attentive to following the recommended graphics and display settings.
Frequently Asked Questions
Here we try to cover some of the common questions regarding LCD pressure spots and associated problems.
If your display has dead pixels, you will notice black spots on the screen. If there are only a few, they may be undetectable. If numerous pixels are dead, then you will clearly see them as a black spot. Unfortunately, spotting is a common problem for LCD monitors, and you have to handle dead pixels very carefully.
It actually depends on the type of problem. If your display has black pressure marks, it is nearly impossible to fully remove them from your laptop’s screen. However, if your laptop or TV screen contains white-colored pressure marks, you can try to fix them with glue after removing the display carefully. (See above.)
Final Words
Nobody wants to see a pressure mark on their LCD screen, but it happens nevertheless. . The above strategies explain how to fix pressure spots on an LCD screen, and they are worth trying out when you are faced with problematic pressure spots.
Hopefully, one of the methods we have explained will provide an acceptable solution. Remember: before trying out a method, first read the instructions carefully. And, of course, always try to prevent further pressure spots from developing.