The biggest enemy of a competitive gamer is lagging. If you are a competitive gamer, you know how important having a responsive gaming experience is. You can see the fastest movements of the opponents on the battlefield without facing any issues. And have a blur-free clear view around you on the battlefield.
If your CPU is updated enough to play the competitive game but still faces these problems, then it’s high time you need to change your monitor. These problems are common if you are using a regular 64 Hz monitor.
Asus vg248 provides you with a 144 Hz refresh rate. This means it refreshes 144 times in a second! With the Asus vg248 best settings, you’ll have the most enjoyable gaming experience you have ever had.
If you are looking for Asus vg248 best settings for your monitor, you are in the right place. Stay with us till the end.
Asus vg248 Best Settings (Top 3)
An affordable monitor with premium quality functionality is everyone’s first choice. The Asus vg248qe is the one that can give you both. With a resolution of 1920*1080, it has a 144 Hz refresh rate. Asus vg248qe is well known for its performance and competitive FPS gaming.
It went up on the list of gamers’ first choices when it was released on the market because of its affordable price, blur-free view, and along with much more exciting and premium picture quality experiences. And these became the reasons for its huge hits.
The monitor’s design attracts the eye’s attention and has excellent viewing angles. Also, Asus vg248qe was designed for home entertainment purposes with built-in speakers.
If you already have the Asus vg248qe monitor and looking for the best OSD settings for your monitor, then you are in the right place.
There are some changes you need to make in order to calibrate your monitor according to your preference. It would be best if you made some changes in your settings and on your OSD (on-screen display) settings. Though in the on-screen display(OSD) menu Asus already includes some preset settings. But these presets might not fit your preference.
We find some of the best settings you can follow. Check these out if it goes right with your preference or not.
Settings 1:
| Splendid mode: | Theatre |
| Brightness: | 35 |
| Contrast | 60 |
| Sharpness | 48 |
| Saturation | 60 |
| Color temp | Red-96, Green-95, Blue-86(this should be user mode) |
| Ascr | off |
| Skin tone | natural |
| Trace free | 60 |
| Intelligent view | Disabled |
Settings 2:
| Magnificent mode | Standard |
| Brightness | 65 |
| Contrast | 75 |
| Sharpness | 40 |
| Saturation | 50 |
| Color temp | Red-90, Green-94, Blue-88 |
| Ascr | off |
| Skin tone | natural |
| Trace free | 40 |
| Intelligent view | Disabled |
Settings 3:
| Splendid mode | Theatre |
| Brightness | 38 |
| Contrast | 65 |
| Sharpness | 45 |
| Saturation | 45 |
| Color temp | Red-97, Green-97, Blue-85(this should be user mode) |
| Ascr | off |
| Skin tone | natural |
| Trace free | 60 |
| Intelligent view | Disabled |
Setting 4(bonus)
| Splendid mode | Theatre |
| Brightness | 55 |
| Contrast | 45 |
| Sharpness | 40 |
| Saturation | 55 |
| Color temp | mode |
| Ascr | off |
| Skin tone | natural |
| Trace free | under 50 |
| Intelligent view | Disabled |
Now, you can apply these settings individually. Each time you apply one setting, try to make some changes here and there so that you can get the perfect experience you are searching for.
Breaking Down the Preset

If you don’t want to go through any of these hassles, you can apply the preset modes already on the default setting. Let’s find out how the preset modes work. But before you jump on the discussion, you need to know that these preset modes work differently on different activities.
These modes work differently on different activities. If one preset mode works fine on gaming, it doesn’t mean it will work too on editing. Now let’s dive into the discussion.
sRGB mode:
According to our review, this preset mode is one of the most well-balanced modes of all other modes. There is minimum shade pounding. Even the white point is ok, and the brightness is on the high side. You cannot change this mode’s brightness, contrast, and sharpness.
Theater mode:
Theater mode usually improves color settings and contrast. The Theater mode and the scenery mode work almost the same. You will detect that the shade pounding is a little reduced here. This mode provides some extra on-screen display options, and these are—Temp, Ascr, Saturation, Brightness, Contrast, Sharpness, and Skin-tone.
Scenery mode:
If you are looking for a perfect visual experience, then scenery mode is the one that works fine. In this mode, the image quality and the sharpness are high. But you can make a difference in the on-screen display settings here. These features are—Ascr, skin tone, sharpness, brightness, contrast, temp, and color.
Standard mode (144 Hz):
As per the review, the standard mode is good for the gaming experience. It is also known as a game mode. The quality of the image is a bit faded with extra brightness in this mode, and the shades are depthless here. The on-screen display features that you can modify here are—color temp, contrast, and brightness.
Standard mode (60 Hz):
In this mode, everything looks so bright. Usually, most people who don’t care about any functionality use this mode. Though you can convert this from 60 Hz to 144Hz anytime, you want. The on-screen display features are—color temp, brightness, and contrast.
Game mode:
This mode functionality is similar to the theatre modes. It was designed especially for gamers. The saturation and sharpness are very high in this mode, so it looks brighter and more colorful in a generally exciting way. You can alter these features while using this mode—saturation, brightness, contrast, color temp, ASCR, sharpness, and skin tone.
Night view mode:
In other modes, your display produces blue light that we usually see in the daylight, which keeps our eyes wide open but in the night view mode, our monitor produces a warm and soft light that doesn’t affect our eyes and hamper our sleep. Within this mode, the image appears soft, and the contrast level is shallow. But you can change the features according to your preference. The changeable features are—skin tone, ASCR, sharpness, saturation, contrast, brightness, and color temp.
How to Install VG248qe Color Profile
Usually, the Asus VG248QE monitor comes with a pre-adjusted, and according to them, that default display settings will deliver the best picture quality and other on-screen content. But, after testing different settings, we found that this is not real in every case.
Then, how would you solve the color problem? Well, we’ve got your back. All you need to do is install and activate the ICC profile. But let’s answer this question about what ICC stands for. It stands for International Color Consortium. Using the ICC profile on your monitor will provide you with the correct display color according to your preference than the default display settings.
So, without further due, let’s find out how to install the Asus VG248QE color profile in steps.
- Step 1: First, you need the ICC profile to be downloaded according to GPU (Graphics Processing unit)
- Step 2: After the downloading is completed, you need to right-click on the profile, and you’ll see an option to install the profile.
- Step 3: After the installation is complete, now search for the color management and open the setting.
- Step 4: Before you click for install, select the monitor you want to install the color profile.
- Step 5: Tick the “use my settings for this device” option.
- Step 6: You must press the “Add” button on the screen and select the profile.
- Step 7: Select the profile you want to install and press ok.
- Step 8: After the activation is complete, make sure to set the ICC profile “set as default profile” and click the close button. You are all done.
How to Create the ICC Profile
After you’ve downloaded and installed the ICC profile, you can create the ICC profile. Let’s find out how you can create the ICC profile.
- Step 1: Search for color management on the search bar
- Step 2: Click on the color management box
- Step 3: After opening the box, you will find the options. ‘Devices,’ ‘All profiles,’ ‘Advanced’ tab.
- Step 4: Click on the ‘Advanced’ tab, and that will open another tab
- Step 5: Click ‘Change system defaults’ from the bottom of the screen.
- Step 6: Now, you need to click on the ‘Advanced’ tab again.
- Step 7: Click the checkbox from next to bottom left of the screen
- Step 8: Hit the ‘Close’ button.
Now you are all done, and your ICC profile has been created successfully.
How to Reset Color Profile
Technical changes are always tricky. One slightest mistake and everything goes down the drain. While installing the ICC profile, many users make mistakes. And they have to start from scratch.
In this part, we will talk about how you would reset the color profile on windows. Simply follow these steps and reset your monitor settings to the default color profile.
- Step 1: First, you need to open the start option.
- Step 2: Now, search for “Color management” and click on the top result.
- Step 3: Here, you will find the options. ‘Devices,’ ‘All Profiles,’ and ‘Advanced’
- Step 4: Click on the ‘Devices’ tab.
- Step 5: Now, click on the drop-down menu and select the monitor that needs to reset.
- Step 6: After selecting that option, select the ‘Reset my settings to the system defaults’ option.
After successfully completing all the steps discussed above, the monitor will revert to its default color profile settings.
Asus VG248QG Best Settings for Gaming
Asus VG248VQ is a perfect monitor for gaming. This monitor provides a 165 Hz refresh rate, which is heavenly for gamers. Also, the G-Sync technology increases visual effectiveness. As a result, it decreased the lagging problem ultimately.
With a response time of 0.5ms, this particular monitor gives your 165 Hz refresh time. These 24 inches monitor only weigh 11.50 lbs.
If you want to experience its effectiveness, you should know the best settings for your monitor. Suppose you can apply the best settings as it requires. You will have the best gaming experience of all time.
Asus VG248QG color quality settings:
| Splendid mode: | Standard |
| Brightness | 90 |
| Contrast | 70 |
| Sharpness | 50 |
| Saturation | 50 |
| Time of color | Red-96, Green-94, Blue-88(user mode) |
| Ascr | off |
| The tone of skin | natural |
| Trace free | 50 |
| Intelligent view | Disabled |
There is a common question that surfs around, which is, does Asus VG248 support HDR? The brief answer to this question is NO! It only supports SDR.
How Do I Enable 165hz on My Asus vg248?
Overlooking your monitor is pretty straightforward. The process usually depends on which graphics card you use, NVIDIA or AMD. We will discuss both in this section. Let’s find out how it works on the NVIDIA graphics card.
Enabling 165Hz on the NVIDIA graphics card:
- You first need to click on the NVIDIA control panel and get that open.
- Under the display section, click on set-up G-SYNC.
- Now, tick the check box that says enable G-SYNC for full-screen mode.
- Get back from the menu.
- Now, right-click on the mouse and select “display settings.”
- Click on the “Display adapter properties.” That will open another tab.
- Now, select monitor, click the drop-down menu “screen refresh rate,” and select the highest refresh on the bar. And click “Ok.”
- Now, go to display and click to change resolution.
- Click the customize option, which will allow you to select an alternative resolution to your current one.
- Now, look for ‘enable resolution not exposed by the display.’ Tick the checkbox next to it.
- Now you can overlook the current screen refresh rate.
Note: Experts suggest doing this process slowly. To see which refresh works on your monitor.
Enabling 165Hz on the AMD graphics card: The overlooking process on the AMD graphics card is almost the same as the NVIDIA GPU.
- Step 1: Go to your AMD control panel.
- Step 2: Just like the previous process, create a custom resolution
- Step 3: Now, look for ‘enable resolution not exposed by the display.’ Tick the checkbox next to it.
- Step 4: Now, you can easily overlook the current screen refresh rate.
As we noted earlier, it is safe to increase the refresh rate slowly.
Asus VG248QE Best Settings for Xbox and PS5
In the gaming community, Asus is a well-known company. It always touches the customers’ expectations through its innovation, especially when it comes to its monitor.
Throughout the years, it has produced several monitors in the market, but the one that stands out from all of them is Asus VG248QE. The 1920*1080 screen ratio has a refresh rate of 144 Hz, which is rare at this price. You can play any competitive game or FPS game with this monitor.
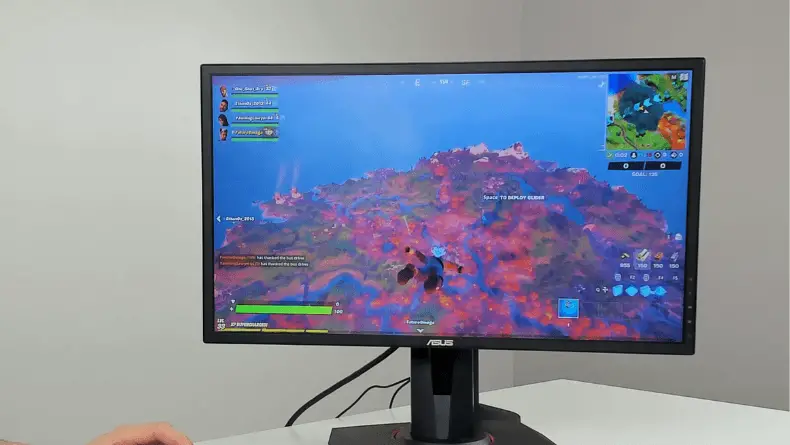
Asus VG248QE is also great for console gaming. The default settings might not work fine with the console. That’s why we are here. We will guide you through the process of how you can get the best settings for PS5 or Xbox series X.
There are no specific settings in either console. All you need to do is change the refresh rate and tweak some resolution that the console prefers.
Let’s dive into the settings.
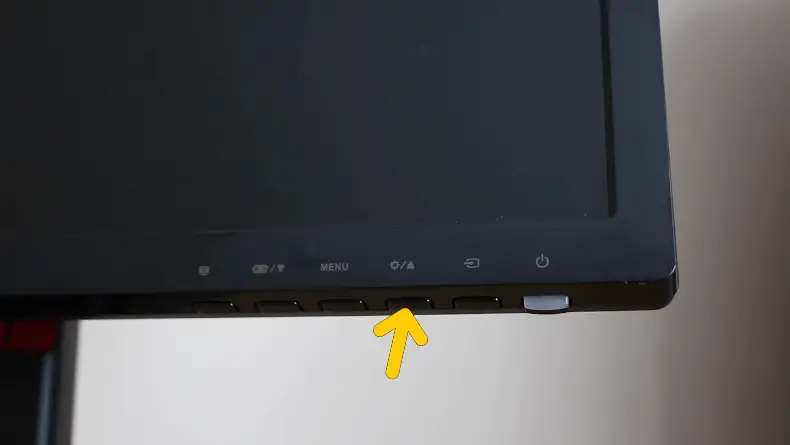
Correct display mode: Display mode is the first thing that needs to be changed in that process. You need to change some settings for gaming smoothness. First, you must go to your monitor settings from the bottom left of your screen. Click on splendid. Now click on ‘game mode’ and reset the monitor.
Alter the blue light filter: Go to the monitor’s settings from the bottom right of your monitor’s screen. Now select the blue light filters. Make the changes following these settings.
| Brightness | 100 |
| Contrast | 50 |
| Saturation | 70 |
| Color Temperature | User Mode |
| Skin Tone | Natural |
| SmartView | Off |
Adjust image settings: The first thing you need to do in this part is to go to the monitor’s settings by clicking the menu button. Under the color, go to the image section. Now set your sharpness and trace free to 60 and set the ASCR off.
Now you are all set to enjoy your console with the Asus VG248QE!
Conclusion
If you have an Asus VG248 monitor and want to bring the best out of it, then the settings discussed above will surely help you. We analyze these settings to enhance the image quality and, therefore, the gameplay experience.
As none of the panels are indistinguishable, you may want to adjust some corrections here and there for the results you prefer.
There are some preset default settings already in the system. But these presets usually don’t go along with the user preferences. Every individual prefers different viewing angles, picture quality, brightness, contrast, etc.
That’s why we bought these settings for you to have the best gaming or watching experience. These settings are not everything. We cannot guarantee that these settings will work for you, as you might need to tweak some options here and there. But our researcher collected data from users’ experiences and reviews.